Limited Depth of Field Underwater Photography
November 13th, 2019
Limited Depth of Field in Underwater Photography
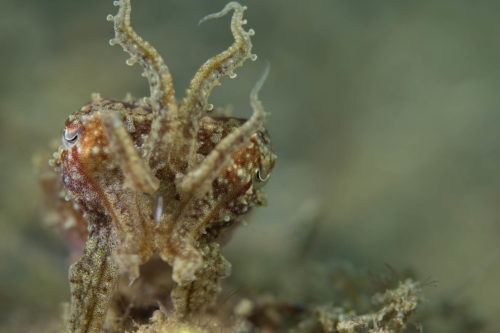
Have you taken a macro underwater photograph that you were convinced would be fantastic, yet you were underwhelmed by the result? What looked amazing through the viewfinder was rather unappealing on the computer? Did you know right away what the problem was? Or was it one of those instances where you knew something was wrong but couldn’t quite put your finger on it? Quite often, in a situation such as this, it’s due to a messy background distracting the eye from the main subject. This is something easier to fix than you might think and it won’t cost a fortune.
Macro underwater photography is a very specialized field. At the same time, it’s also a very competitive one, everyone wants to stand out from the crowd. In recent years, with the booming popularity of macro underwater photography, this has led to a wave of new products entering the market. Many of these products are designed to focus the viewer on the main subject. Snoots, colored lights, light diffusion devices, and all kinds of diopters are constantly being introduced to the masses. Yet, all of these new products cost money. In many instances, the expensive price is not worth the effort. Instead, there are much easier ways to allow your subject to stand out from the background. In this tutorial we discuss the most simple, yet effective choice, Limited Depth of Field.
Understanding Depth of Field
Simply put, “Depth of Field” refers to how much of the scene of a photograph is in focus. When a photo is referred to as having “good depth of field”, it means there is a wide range of focus in front of and beyond the focus point. When a photo is referred to as having “limited depth of field”, it means only a small portion around the focus point is sharp. Photographers can utilize this technique as part of their composition. Tech Radar has an easy to understand explanation of Depth of Field on their website.
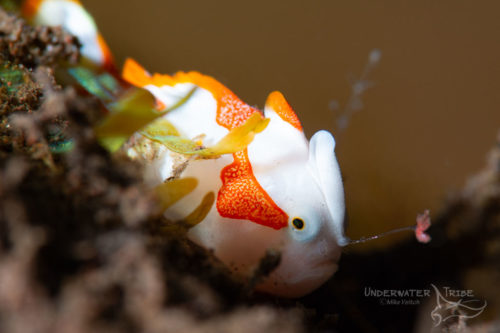
Macro depth of field is shallow, background out of focus
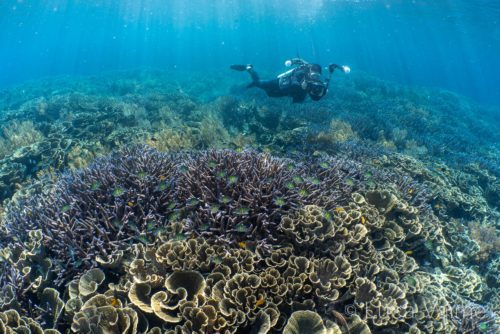
Wide depth of field, diver who is 3 metres away is also in focus
Three Elements to Think About
There are three elements which influence the Depth of Field of an underwater photograph: lens choice, distance fom subject, and the aperture. Wide angle lenses give a deep depth of field throughout their aperture range due to their angle of view. In wide angle photographs, we typically desire that wide range of focus to achieve as much as possible in focus. Ideally, the main subject, and anything in the background such as a diver, is best to appear in focus.
However, in macro photogaphy, having a wide depth of field is not necessarily a good thing. Macro photography is when distance and aperture choice become more important. When shooting macro, we typically use a long lens from a close distance. The closer that we are to a subject, the less apparent depth of field we will have. This is the main reason why it’s so hard to get a subject completely in focus when shooting close ups. How often do you decry the fact that your nudibranch rhinophores are in focus but the gills are soft? This is due to depth of field and distance using a macro lens.
The third and most important variable is the f-stop. A more open f-stop such as f4 will give much less depth than at f22. Therefore, simply changing the aperture of the lens will create changes in depth of field which can be used to alter the composition. This is very important when shooting close ups.
So What Depth of Field Do We Want?
Choosing the right f-stop can really make or break the shot. In macro photography, one of the most important elements of composition is creating separation between subject and background. There are many ways to do so, however, for this article we will focus on depth of field. In future articles we will discuss other techniques to create separation.
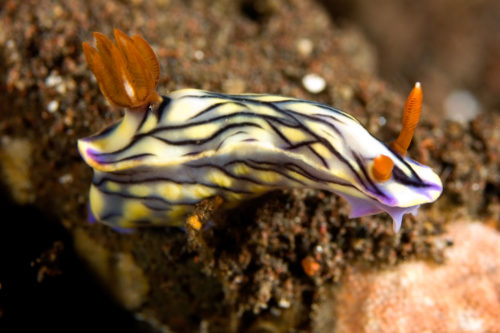
I.D. Style Photo, high fstop, distracting background
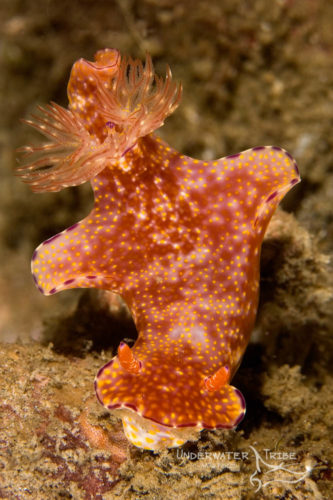
The nudi is in focus but so is the background
There are basically two kinds of macro photographs: identification and artistic. Each of these techniques require a different DOF. In identification photos, we strive to show all of the descriptive elements of a subject in order to identify it correctly. To do this properly, we should photograph the subject with the widest amount of depth of field. For example, nudibranch enthusiasts constantly need identification of new and exciting species. In order for others to help identify them from photographs, it’s good to have as much of the subject in focus as possible. Using the f stop range of f16-f22 is the best practice for identification needs. However, as can be seen in the above examples, the background tends to be distracting as it’s too “in focus”.
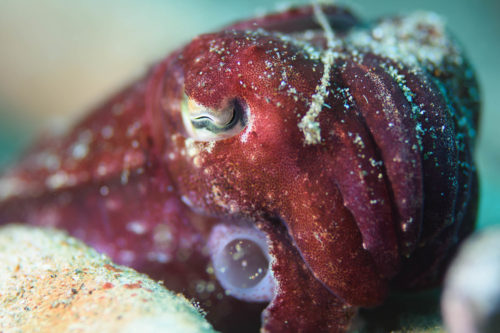
f5.6 only eye and surrounding in focus
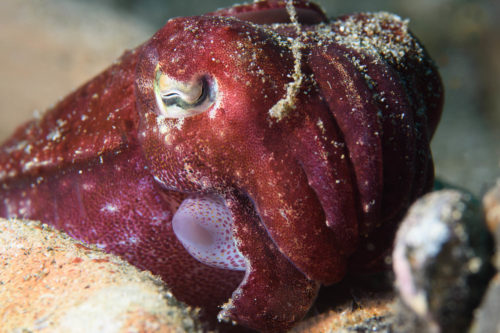
f16 Lots in Focus
Artististic or Bokeh Techniques
However, many photographers are taking pictures for artistic pleasure instead. In this case, the goal is to have the subject stand out fom the background as much as possible. Techniques such as snooting or black backgounds are popular ways to create this. But another pleasing method is also available at the twist of a dial. Limiting the depth of field by using open apertures is a very effective way to create separation. Simply tune in an f stop of f8 to f2.8 and watch the backgound fade out of focus. Do be careful when using wide open settings such as f2.8 or f4, as oftentimes the shallow range means that not enough of the main subject will be in focus. This technique is especially effective when shooting subjects a little further away, as it will keep the main subject sharp and blur the background.
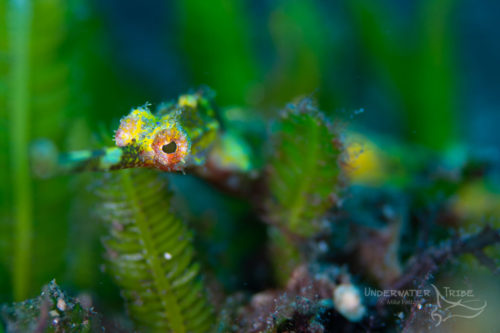
Shallow DOF, background out of focus
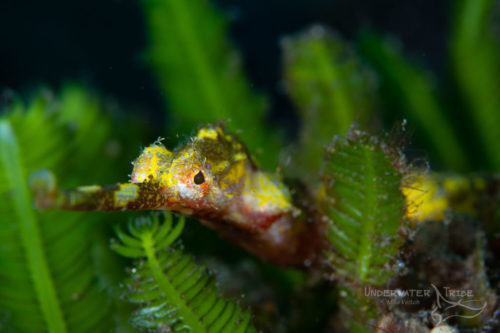
Background more in focus with higher fstop
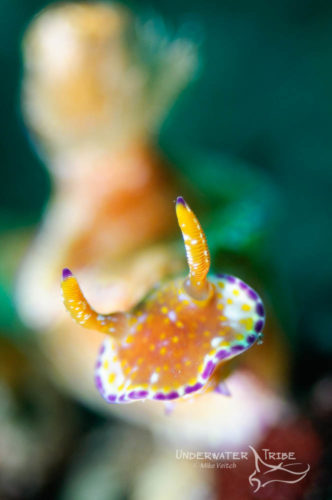
A shallow DOF focuses attention on the rhinophores
Do I Need Any Special Techniques?
Thee are no special tools needed for this technique to work. However, there are a few ideas to keep in mind when shooting this way:
1. Use TTL or turn down the flash, high flash power will over expose everything.
2. Avoid shooting at the brightest part of the day. Try shooting when deep, on overcast days, or early to late in the day or there will be too much natural light.
3. Frame subjects that are a little bit away fom their surroundings to achieve the best results. Shooting a nudibanch flat on a rock or on a down angle toward the sand will limit the effectiveness of this technique.
4. Try several different f stops to see which amount of depth of field works best.
5. Don’t use this technique with diopters. Diopters will create their own very effective limited DOF, without the need to open up the f-stop. In fact, when using diopters, use f16 to f22 in order to attain an effective DOF.
6. Do be aware of natural light. When using an open f-stop it’s possible for too much natural light to enter the frame, combat this with a fast shutter speed.
And that is really about it! This is a super easy technique to try that doesn’t require the purchase of any expensive equipment. It will instantly turn boring images to wasteful works of art. Give this one a go on your next underwater macro dive trip.
Interested in learning more? Check out “Why Two Strobes are Not Necessarily Better Than One!”
