Add A Graphic Logo Watermark
One of the most common questions we receive on Photo Workshops is “How do I add a graphic logo watermark?” Having an eye catching logo as your watermark on a photograph does look more professional than a simple name. In this short tutorial we will walk you through the way to create a watermark using Adobe Lightroom.
One thing that you will need to start is a logo! This tutorial doesn’t cover the art of creating a logo. Although you can use the jpg of the logo as your watermark, we suggest that creating a transparent background will work best. For information about how to create a transparent background have a look at this easy to follow video.
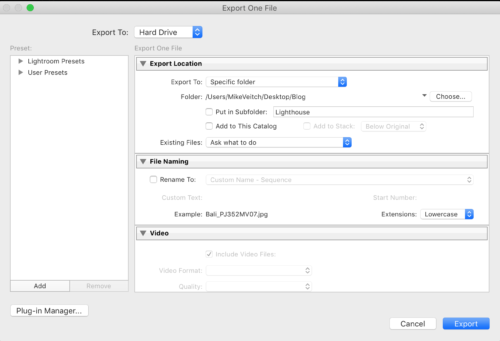
Once you have your logo ready, it’s very simple to use Adobe Lightroom to add it to your photo. We use a series of screen grabs to show the steps needed to do so.
First step, open the Export menu in Lightroom
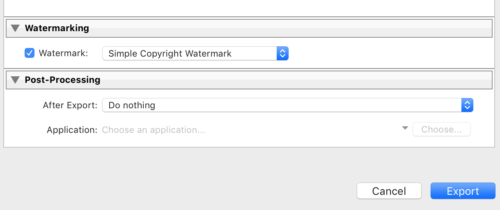
Next, scroll down to the “Watermarking” tab
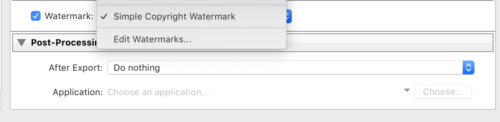
Click on the Up/Down arrow to open the watermarking drop down and choose Edit Watermarks
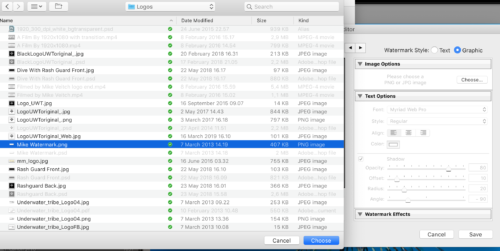
The Watermark Editor will appear, on the top right click the “Graphic” button (or choose Text if you prefer to only do your name)
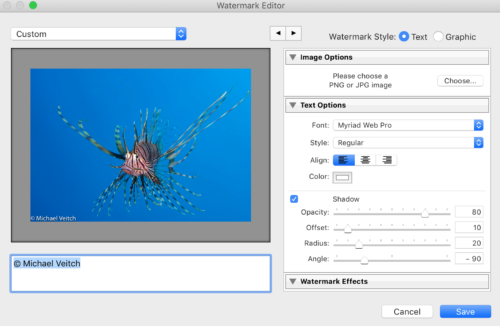
Navigate to the folder which holds your logo, this will be a .png file (with transparent background)
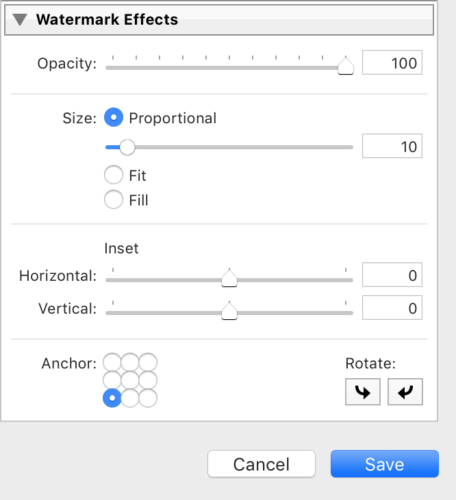
Once the logo opens, you can then choose different options like the opacity, proportion, and where on the photo it will appear
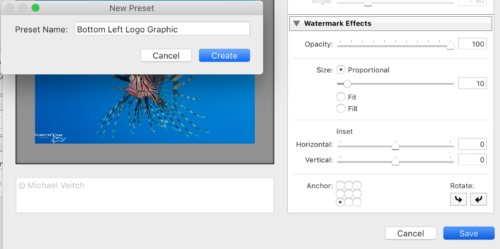
Once you are happy with the way that your logo is placed, you can then click Save which will allow you to create a New Preset. Be sure to name the preset something descriptive so you can remember which preset it is. (I often change between left and right depending on the photo)
Now, the next time you enter the Export menu all you need to do is choose the Preset that you created and it will automatically create the watermark you designed.

And that is all there is to it! By creating a watermark preset, or series of presets, you will save a lot of time. There is no need to go through all of these steps each time. Please let us know if you have any questions about it. If you are interested in learning how to add your copyright to the image as well, have a look here.