How To Add Your Copyright To Every Image
Have you ever wondered how to add your copyright to your images? We are not talking about a watermark here, but instead your name embedded in the file. Why would you want to do this you may ask? It’s step one of protecting your images online. All too often people and companies use other people’s photos online without credit or payment. A watermark is a good tool to avoid online theft, however, it can easily be cropped out. An embedded copyright on the other hand stays with the image upon upload. If there is questions about ownership of an image, the metadata can be checked for copyright. We will discuss creating watermarks in a future article.
For this discussion we will be using Adobe Lightroom. Lightroom is a great tool that all photographers should use to keep track of their images. If the price is too high, there are similar “freeware” programs around which also work. For our examples below however, we will use Lightroom. Without further ado, let’s get on with the show.
Step 1 – The Import Process
The first step is to open Lightroom and click on the “Import” button to import a set of photos. Once on the “Import” page look at the right side of the screen and find the “Metadata” line under “Apply During Import”.
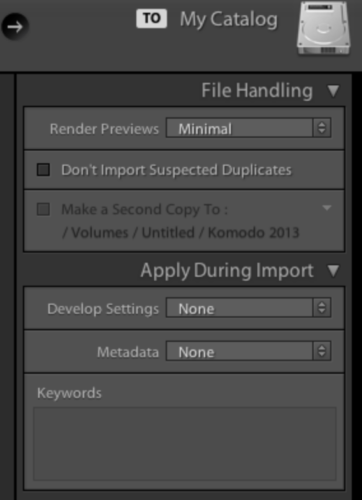
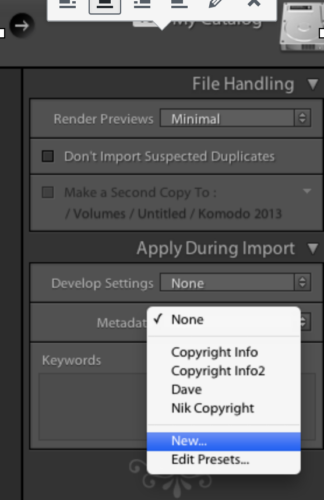
Next, under the “Apply During Import” box, create a Preset by selecting “New” from the Metadata drop down list. You can ignore the “Develop Settings” drop down list.
Step 2 – Create Your Copyright
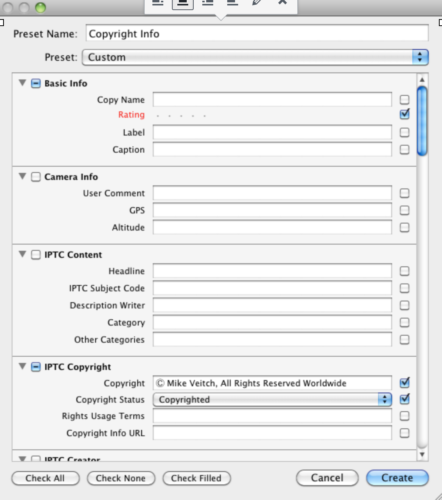
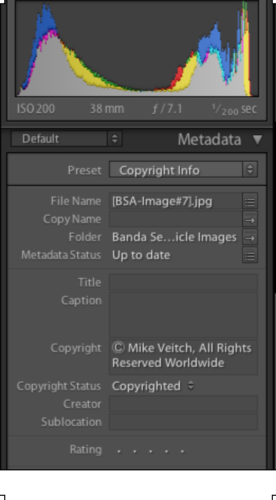
When you click on “New” a new window opens “New Metadata Preset”. In the “Preset Name” box you can call it “Copyright Info”. In this window fill in the appropriate boxes with the necessary information. Be sure to also click the “Copyrighted” option in the Copyright Status drop down list. Then tick the boxes to the right of these two options (don’t tick any other boxes). Now, simply click Create at the bottom.
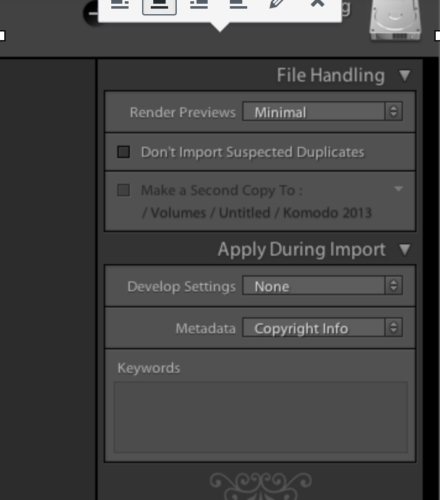
You now have a Copyright Preset that you can click on every time you import a new set of photos to Lightroom by simply making sure that the “Copyright Info” preset is selected each time you import. As an added bonus, Lightroom leaves that field checked every time you open Lightroom if you had it clicked the previous time that Lightroom was open.
Now when you look at your File Info on Photoshop or the Metadata panel on Lightroom you should see your Copyright on every image.
But How Do I Enter the © Symbol?
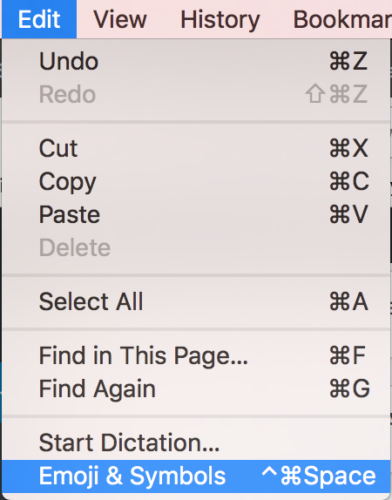
Finding the copyright symbol can be a bit of a frustrating task! However, there are a few ways to do it. If you are using a Mac, the easiest is to open a program such as Word or your web browser. From there, click on the Edit button on the menu bar. At the bottom of the Edit menu is “Emoji & Symbols”. Once you are in this menu simply type “copyright” in the search bar and it will find the © symbol for you. Then click on the symbol and copy it.

If you are using Windows you can use the Character Map which is found in the Start menu.
There are other ways of creating the symbol using keyboard shortcuts as well. Lifewire has a post about different ways of doing so here.
Check out more Underwater Photo Tutorials on our Tutorials Page.