Shooting Underwater With Filters
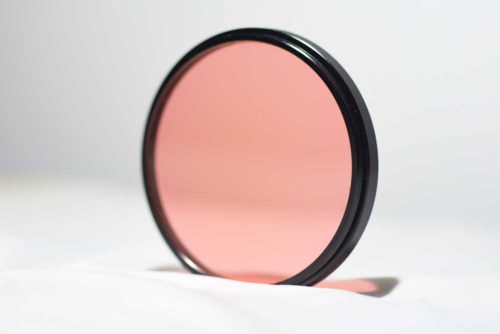
Shooting underwater with filters is a great way to capture colourful photos underwater without the expense of a strobe. Strobes are expensive and a good quality one starts at $600 or more. The typical filter that we are discussing is based on the red colour spectrum. The reason for this colour is that it helps to reduce the green and blue spectrums that are so prevalent underwater. We need to bring the red, blue, and green spectrums closer together in order to get colourful pictures or video. Filters work best from a depth of around 2-3 metres down to around 15 metres. Deeper than this there is not enough natural light to make filters effective. Although there are filters that can be matched with underwater lights, that is for a future topic.
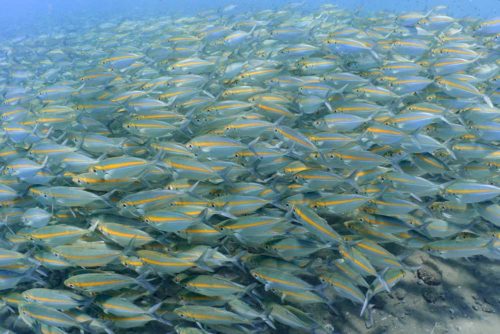
Shot with a filter
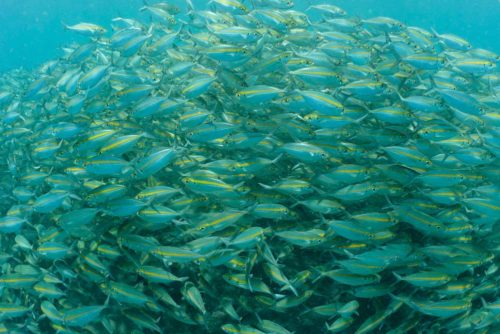
The same scene on auto white balance, no filter
What Situations Work for Shooting Underwater with Filters?
Filters are the perfect accessory for shooting wide angle photos in shallow, sunny conditions. They can also be used with standard angle photography to capture close up subjects. Wide angle scenes will benefit from a strong, rich blue that results from shooting with filters underwater. Here are a few tips to get you started:
- No Strobes – they can be used but are not ideal, use natural light only
- Stay Shallow – as the shot will be illuminated with natural light, the best results happen 15 metres and shallower
- Keep the Sun Behind You – illuminate the subject properly by using the sun to help
- Shoot Slightly Down – we often say “Shoot UP” in underwater photography but for filter photography shooting slightly downward helps
- Use manual white balance and reset it as you change depths, each camera will have a different way to do so
- Stick with wide angle or standard lenses, this will provide the best potential for filters. Macro is best shot with strobes.
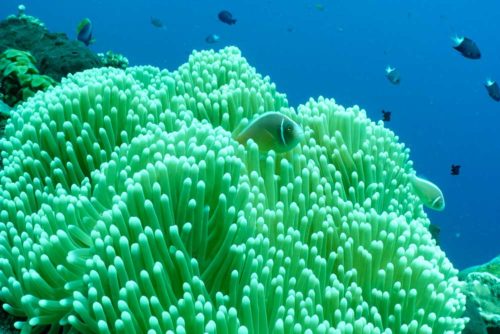
Auto WB, No Filter
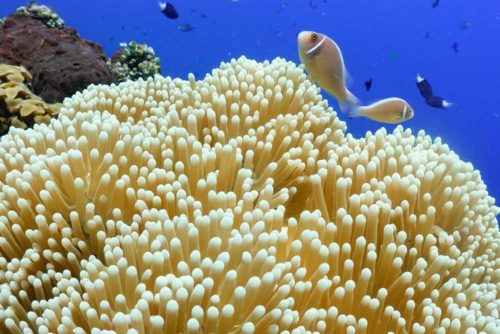
Manual WB and Filter
What About Video?
Video is another area where it’s beneficial to shoot with filters. Good video lights are bulky and expensive and can only illuminate close subjects. In order to achieve proper colour balance of a large reef, using filters helps immensely. Video lights are great when subjects are within 3 feet (90 cm) but anything further than that can’t be lit properly. As with photo, use red filters and keep the sun behind to get the best colours. Many video camera housings come with convenient “flip filters” already installed inside the housing.
Did you enjoy this short photo tutorial? Check out our list of Photo Tutorials on our main tutorial page as well.
Our friends over at Magic Filters provide the best and largest range of filters for underwater photographers so head on over to their website to have a look at their products.
